起動!
先ほど作ったブートフロッピーでターゲットマシンをブートして、いよいよインストールを開始します。
ブートフロッピーでブートすると、
                  Welcome to Debian GNU/Linux 3.0!

This is the Debian Rescue disk. Keep it once you have installed your system,
as you can boot from it to repair the system on your hard disk if that ever
becomes necessary (press <f3> for details).

On most systems, you can go ahead and press <enter> to begin installation.
You will probably want to try doing that before you try anything else.  If
you run into trouble or if you already have questions, press <f1> for
quick installation help.

WARNING: You should completely back up all of your hard disks before
    proceeding. The installation procedure can completely and cirreversibly
    erase them! If you haven't made backups yet, remove the rescue disk
    from the drive and press <reset> or <control -Alt-Del> to get back to
    your old system.

Debian GNU/Linux comes with ABSOLUTELY NO WARRANTY, to the extent
permitted by applicable law. For copyright information, press <f10>.

This disk uses the Linux kernel 2.4.18-bf2.4


Press <f1> for help, or <enter> to boot.
boot: _
と表示されるはずです。 これが出ない場合は、ブートフロッピーの作り方とBIOSの設定(フロッピーブートする設定かどうか)を確認しましょう。
いろいろ書いてありますが、とりあえずENTERを押して次に進みます。 しばらく、フロッピーが動作し、画面にメッセージがたくさん表示されていきます。
VFS: Insert root floppy disk to be loaded into RAM disk and press ENTER
というところで止まったら、言われたとおりにルートイメージを書き込んだフロッピーディスクに入れ替えてENTERを押しましょう。
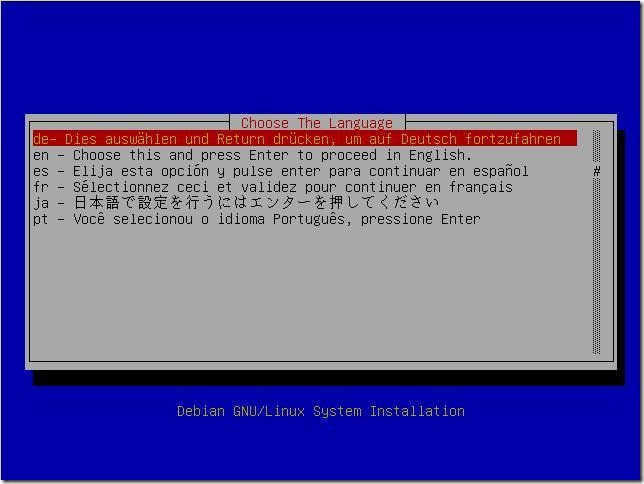
ENTERを押すと、再びフロッピーが動作しデータの読み込みが開始され、以下の画面が表示されるはずです。

ここで「ja」を選択して次に進みます。


コメント